Showing posts with label landscape design. Show all posts

Saturday, June 26, 2010

Tour de COOP

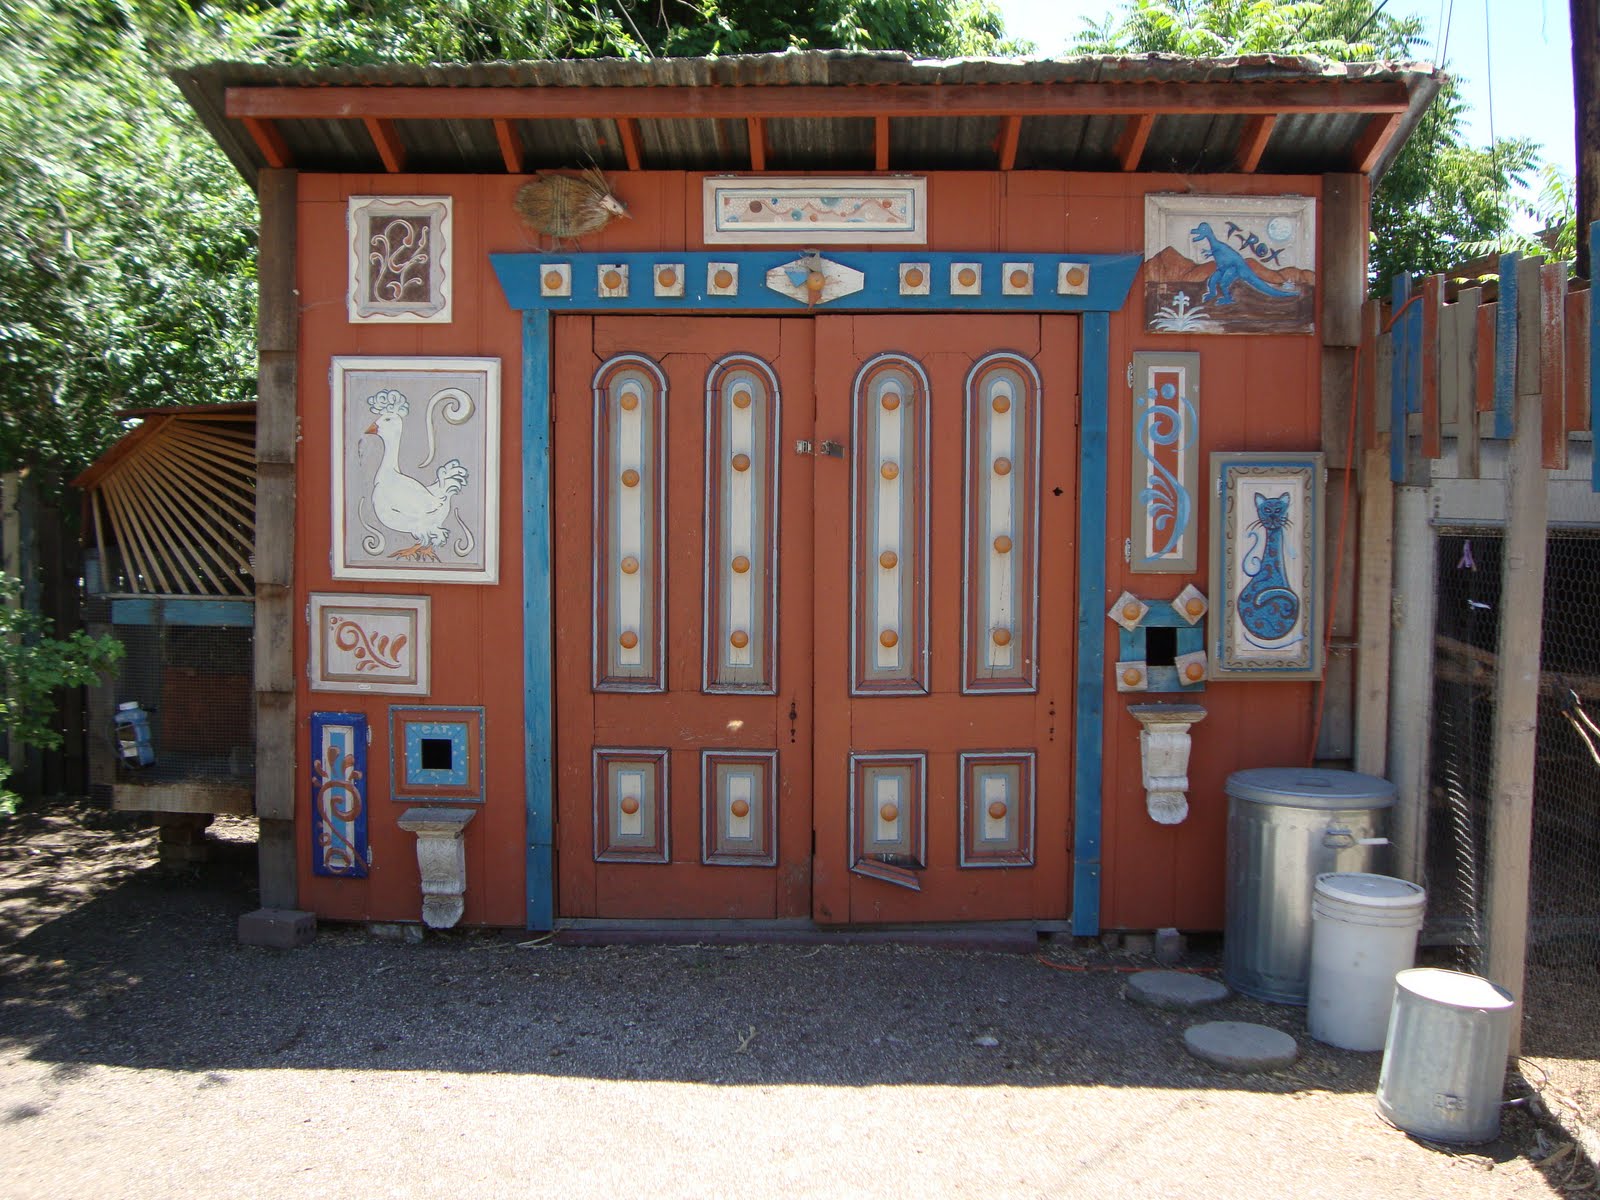
Recently, I took a tour of urban chicken coops organized by the Wasatch Community Gardens group. I was fascinated by the idea of incorporating chickens, vegetable gardens and cultivated landscape areas in one setting. One site offered free home-made pickled eggs to anyone taking the tour. It was delightful!

The tour consisted of 17 coops and residences of which I have highlighted a few in photographs. The mission of the group is to empower people of all ages and incomes to grow and eat healthy, organic, local food. The tour was designed to gather energy, raise awareness and share ideas about urban chicken tending.


For more information click here!

Tuesday, February 16, 2010

Builidng a Pot Fountain

Nothing is more relaxing than the sound of moving water in the garden. Here's how to build a one-of-a-kind water feature.

This water feature consists of an underground, waterproof basin; sturdy grating; and a pot of your choice. Most of the supplies you will need can be found at a plumbing supply or hardware store or a nursery that carries water garden supplies.

Step 1: Plumb the pot
For this step, you'll need your decorative pot, a 1 3/4" by 1" barb fitting, a 1 3/4" PVC female adapter, plumbers epoxy, and a drill with a half-inch masonry bit. First, using a masonry bit, create a drainage hole in the bottom of the pot. If yours already has a hole, it'll probably need to be widened by slowly rotating the masonry bit around the sides of the hole. Then put the barb fitting into the hole so the threaded end goes inside the pot. Next, thread the PVC female adapter onto the end of the barb inside of the pot. Finally, put plumber's epoxy around the base of the fitting to seal it in place and make the container watertight.

Step 2: Install the reservoir
For this step, you'll need a waterproof catch basin, a few cinder blocks, some sand, a heavy duty plastic grate, four feet of flexible tubing, a submersible pump, two hose clamps, flexible screen/mesh, and a reciprocating saw. TIP: A pot 30 inches tall or less will need a pump rated at 950 gallons per hour (gph) or less. A taller pot requires 950 gallons or more. Dig a hole deep enough to allow your catch basin to sit slightly above ground level. Shovel in a 1" layer of sand. This allows you to easily level the reservoir by shifting the sand. Place two or three cinder blocks in the center of the basin to give additional support to the pot. Cut a trap door in the corner of the plastic grate that is large enough for the pump to easily pass through. This gives you easy access to the pump for maintenance without having to disassemble the entire fountain. Cut a small hole in the center of the grate for the flexible tubing. Attach the one end of the tubing to the pump, clamp it in place, and poke the other end out the hole in the center of the grate. Place the screening over the grate and cut a corresponding hole for the flexible tubing.

Step 3: Place the fountain
For this step, you will a length of 3/4" PVC pipe, black spray paint, and some decorative stones. Cut a piece of 3/4" PVC pipe so that it is the same height as the pot and spray the top 6" with black paint. Then, place the PVC pipe (black side up) into the PVC female adaptor in the bottom of the pot. Bring the pot over to reservoir. Twist the flexible tubing onto the barb sticking out of the bottom of the pot and clamp in place. Slowly lift the pot into a standing position. If you have a large pot, you may need a friend to help you with this step. Place decorative stones on top of the screening to disguise the reservoir. Then, fill the reservoir with water, turn on the pump.

Tuesday, February 2, 2010

Choosing a Garden Style

Formal gardens are symmetrical plantings, sheared hedges, rows of flowering plants, and straight lines (Predictable/Visually Shortens)

Informal gardens are asymmetrical or rambling plantings, and gentle curve lines or resemble organic forms (Unpredictable/Visually Lengthens)

Friday, January 22, 2010

Landscape Color is the Key

Pastel colors set a mood of tranquility, best viewed close up, look washed out in harsh mid-day sun.

Bright colors invigorate and energize a garden, hold up well in sunshine, and attract the eye even from a distance.

Complementary colors, colors opposite on the color wheel, are high in contrast and add creative energy.

Harmonious colors, colors next to each on the color wheel, unifies a garden without being monotonous.

Monochromatic colors, a single color, wherein interest is created by using plants with different sizes and shapes of flowers and varying textures.

Friday, January 15, 2010

An Unexpected Show in the Garden

Listed below are some key factors which invite butterflies to your garden with nectar-rich perennial flowers, shrubs and trees. Once established, these bold bloomers will attract a wide variety of these colorful insects, as one romances the butterfly!

- Locate the butterfly garden in a sunny location. Butterflies are cold-blooded insects that are more active in the sunshine.
- If possible, plant your butterfly garden in a spot that is protected from high winds. Gardens near a fence, wall, or hedge will provide a safe haven for your butterfly neighbors.
- Include food plants for the butterfly larvae. Dill, fennel, parsley, carrot, and milkweed are all good choices.
- Never use herbicides or pesticides in your butterfly gardens.
- Butterflies like moisture, too. Fill a shallow dish or saucer with wet sand and sink it into your garden soil. On hot days, butterflies will enjoy the moisture provided by the wet sand.
- Plant a mixture of spring-summer, and fall-blooming perennials as well as annual flowers to provide a complete butterfly menu.

You can get started by letting a corner of your backyard go wild. Many butterfly species lay their eggs on “weed” plants such as clover, nettle, violet, and milkweed. Be sure to plant butterfly-attracting flowers in drifts or clumps. Plants lined up single file like toy soldiers aren’t as pleasing to the eye as those planted in large, more natural-looking groupings.

Friday, January 8, 2010

TSGD - An Easy Approach to Landscape Design

In my experience as a professional, I have found that many home owners get frustrated with a personal landscape design because they just don't quite know where to get started. Through many hours of consulting, an approach called the "TSGD" has been conceptualized. One could say this stands for "Take Some Good aDvice," however; the letters "TSGD" actually stands for a few simple steps to completing a unified landscape plan. These steps are "T" - Theme, "S" - Scheme, "G" - Green, and "D" - Dream. First select a design theme, formal or informal, that suits your lifestyle. Second, create a spatial scheme that meets your needs and uses. Third, select plants that reinforce the schematic opportunities and constraints. And fourth, fulfill your dream by over time implementing the ideas generated from your concept and final plan.

Following is some additional advice and information taken from other sources that will guarantee visual success to a landscape design. Choosing colors is one of the real pleasures of gardening. And now that breeders have expanded the color range of so many plants the possibilities seem endless. Although your gardening goal may be simply to surround yourself with colorful flowers and foliage, you should be aware that color can play special roles. Your design will take shape more smoothly if you decide on a color scheme from the start. Before making a firm decision on a set of colors, remember to consider garden paving, the facade of your house, and any other conspicuous features.